Introduction
Once an order comes into your store - whether it is entered by a customer through the website frontend or you manually enter it yourself through the admin backend - it needs to be processed. That means these steps need to be taken:
- Verify that the products are, in fact, in stock and shippable.
- Process the payment(s) on the order.
- Package and ship the order.
- Record the shipment information on the order.
Steps 1 and 3 you would obviously do physically at your stocking location(s). This guide covers how you use your Spree store to manage steps 2 and 4.
Processing Payments
You have received an order in your store - hooray! Either the items are all in stock, or you have adjusted the order to include only those items you can sell to the customer.
Now you need to process the payment on the order. You know best how your store processes things like checks, money orders, and cash, so this guide will focus on processing credit card payments.

Pictured above is an order that is ripe for processing. The current order State is “Complete”, meaning that all of the information the customer needs to provide is present. The Payment State is “Balance Due”, meaning that there is an unpaid balance on the order. The Shipment State is “Pending”, because you can’t ship an order before you collect payment on it.
If you click either the Order Number or the “Edit” icon, you will open the order in Edit mode. Instead, click the “Balance Due” payment state to open the order’s payment info page.

As you can see above, we have only a single payment to process, for the full amount ($22.59). Processing this payment is literally a click away - just click on the “Capture” icon next to the payment.
If the payment is processed successfully, the page will re-load, showing you that the payment state has progressed from “Pending” to “Completed”.

That’s it! Now you can prepare your packages for shipment, then update the order with the shipment information.
Processing Shipments
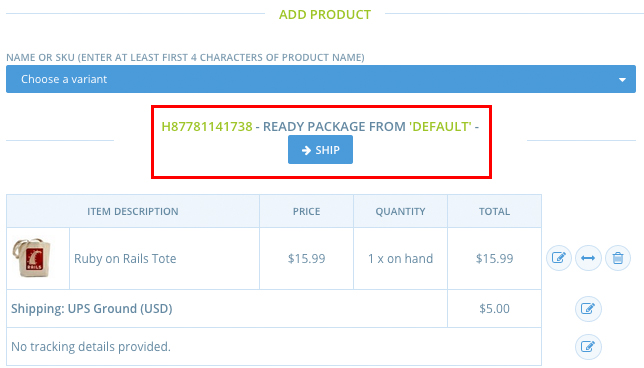
Now, when you visit the Order Summary, you can see that there is a new “Ship” button in the middle of the page.

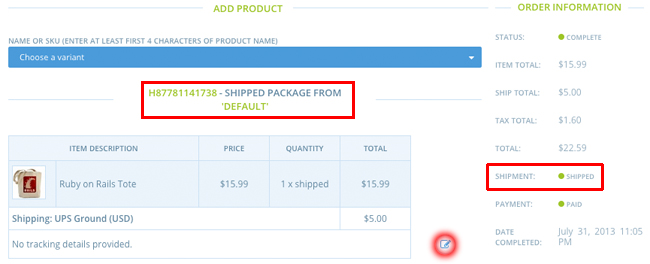
Clicking this button moves the Shipment State from “Ready” to “Shipped”.

The only thing that remains to do now is to click the “Edit” icon next to the tracking details line, and provide tracking info for the package(s). Click the “Save” icon to record this information.
![]()
