Introduction
Returns are a reality of doing business for most e-commerce sites. A customer may find that the item they ordered doesn’t fit, or that it doesn’t fit their needs. The product may be damaged in shipping. There are many reasons why a customer could choose to return an item they purchased in your store. This guide covers how you, as the site administrator, issue RMAs (Return Merchandise Authorizations) and process returns.
Creating RMAs for Returns
You can only create RMAs for orders that have already been shipped. That makes sense, as you wouldn’t authorize a return for something you haven’t sent out yet.
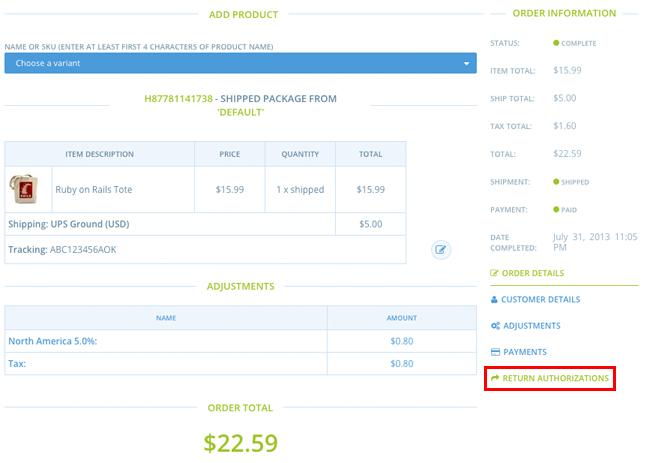
To create an RMA for a shipped order, click the order’s “Return Authorizations” link, then click the “New Return Authorization” button. The form that opens up enables you to select precisely those items that were returned, and issue an RMA for the corresponding amount.
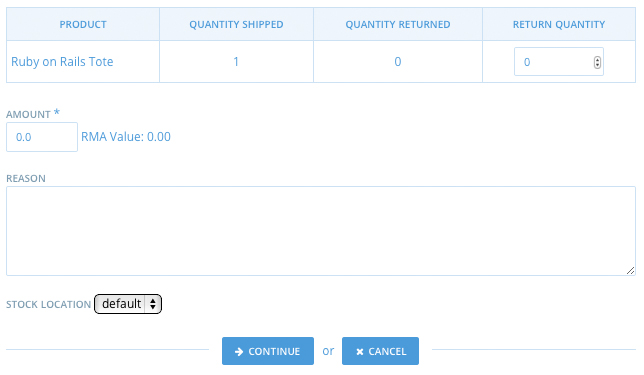
To use it, just increment the quantities for each line item to indicate how many items are being returned. The form will automatically calculate the RMA value based on the sale price of the item(s), but you will have to manually input this value into the “Amount” field. This gives you a chance to adjust for handling fees, restocking fees, damages, etc.
Input the reason for the return, and select the Stock Location the item is coming back to. Click the “Continue” button.
Now you just need to wait for the package to be received at your location.
Processing Returns
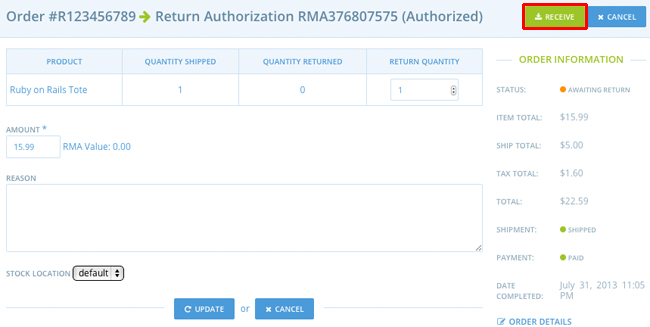
Once you receive a return package, you need to mark the RMA as Received. To do so, go to the order in question and click “Return Authorizations”. Click the “Edit” icon next to the RMA. Click the “Receive” button.
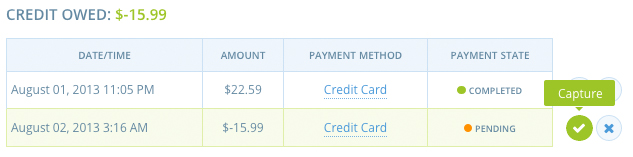
Click “OK” to confirm. The RMA is marked “Received”, and the order is marked with a Payment Status of “Credit Owed”. Furthermore, you now owe the customer a refund of $15.99 - the cost of the items returned.
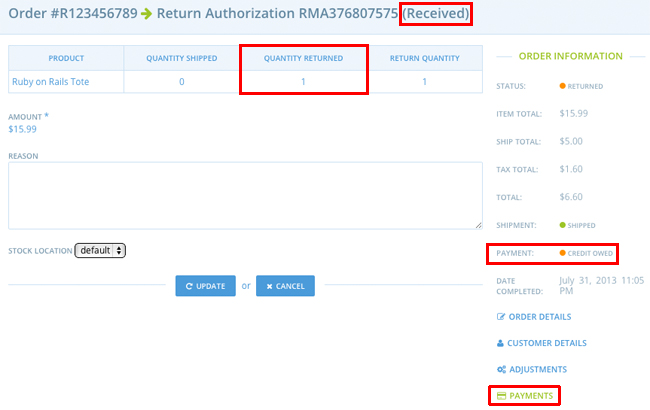
To issue this refund, click the Payments link. You can issue the refund right back to the credit card with which the customer purchased the item. Just click the “New Payment” button. The amount is pre-filled in for you (a negative amount, since it’s a credit and not a charge), and the correct card is already selected.
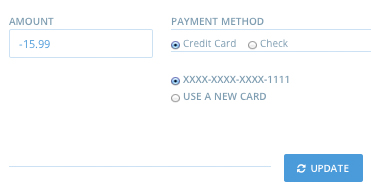
All you need to do is click the “Update” button. As with all transactions, you need to manually capture it by clicking the “Capture” icon.
Your return-processing is complete!